
2 June 2020 Leave a comment Tech-Help, Test automation
Writing UI tests on Flutter is not that different from other mobile technologies. We basically need to interact with our app as any other user would do and double check that our UI looks exactly as it should look. In this article we look at Flutter UI testing: how to write tests, what are common challenges, and what tools can help you speed up the process?
There’s a lot to say about testing in Flutter, however in this article we’ll focus on one important field: testing user interfaces of Flutter apps.
In this article we’ll look at:
- Adding the Flutter Driver package
- Creating a Flutter-driven app
- Creating the Flutter UI test file
- Creating the Flutter UI test
- Running the test
- Testing challenges
Jump over to the basics of Flutter testing if you want to get started from a more general point.
1. Adding the Flutter Driver package
In order to allow us to write UI, each technology has its own component that allows this programmatic interaction. In the Flutter case we have the Flutter_driver package which, according to the Flutter documentation “provides tools to create instrumented apps and drive those apps from a test suite”.
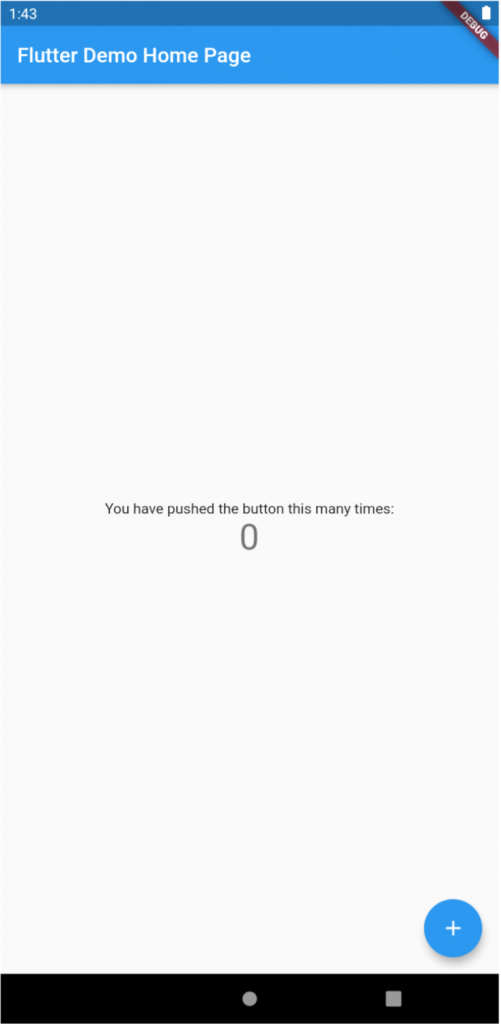
Our example will be based on the test project created by default whenever we create a new Flutter project. For those not familiar with the project, it basically shows a counter text in the middle of the screen and a floating action button used to increment the counter. Our goal is to write a simple Flutter UI test to verify the counter works as expected.
The first step is simple. We have to add the flutter_driver package to our pubspec.yaml file.
name: ui_testing
description: A new Flutter project.
version: 1.0.0+1
environment:
  sdk: ">=2.7.0 <3.0.0"

dependencies:
  flutter:
    sdk: flutter

dev_dependencies:
  flutter_test:
    sdk: flutter
  #Flutter driver
  flutter_driver:
    sdk: flutter
  test: any

flutter:
  uses-material-design: true
2. Creating a Flutter driven app
If we want to manipulate the user interface we have to start a driven app. In order to do that we’ll create a new package called test_driver and add one new file called app.dart which will look like this:
import 'package:flutter_driver/driver_extension.dart';
import 'package:ui_testing/main.dart' as App;
void main() {

  //Enable flutter driver to allow interaction with the app
  enableFlutterDriverExtension();

  //Start our main app from the main lib package
  App.main();
}
We’re basically doing two things here. First we enable the Flutter Driver Extension to allow UI manipulation and then we start our app. As you can see the app we start is our normal Flutter app which comes from the main package (the lib folder). This is all the setup we need to start writing tests. From now on we’ll be able to interact with our app and make assertions based on our user interface.
3. Creating the Flutter UI tests file
With all the initial setup done the only missing part is our tests. We’ll start by creating a new file called app_test.dart. This is not a random name because Flutter will try to execute the tests in a file called app_tests.dart since our test app where we configured the driven app was named app.dart. We could change the main configuration file to tests.dart but then we’d have to use tests_tests.dart for this file.
We’ll start by adding two main things here:
- Define our first group of tests : This will allow us to divide them maybe by screen.
- Initialize and reset the app for each group of tests : Each group of tests has to start with a clean state and should reset the app when ending in order to execute the next test
- since the order of execution should not affect the results.
import 'package:flutter_driver/flutter_driver.dart';
import 'package:test/test.dart';

void main() {
  group('My first group of tests', () {

    FlutterDriver driver;

    // Connect to the Flutter driver before running any tests.
    setUpAll(() async {
      driver = await FlutterDriver.connect();
    });

    // Close the connection to the driver after the tests have completed.
    tearDownAll(() async {
      if (driver != null) {
        driver.close();
      }
    });

  });
}
4. Creating the Flutter UI tests
Once we have our first tests file created with our setup and tearDown methods we just have to add some tests.
In order to write flutter UI tests we need to know how to make a reference to the UI element to access their properties and actions. Similar to other technologies the easiest way to achieve this is making a reference to the UI element key. The key is just the ID that points to our UI element.
Let’s start by creating our first and simplest test. We’ll assert that our counter always starts with 0. To verify this we have to follow three steps :
| 1. Make sure our UI component has a key |
|
| 2. Get a reference to the UI component in our tests file |
|
| 3. Add the test to our first group of tests |
|
Now let’s add another test which verifies that the counter is increased by one after tapping the increment button. We’d follow similar steps:
| 1. Make sure our button has a key |
|
| 2. Get a reference to the button |
|
| 3. Add the test to our first group of tests |
|
Finally our app_tests.dart will look like this:
import 'package:flutter_driver/flutter_driver.dart';
import 'package:test/test.dart';
void main() {
group('My first group of tests', () {
final counterText = find.byValueKey('counter');
final incrementButton = find.byValueKey('increment');
FlutterDriver driver;
// Connect to the Flutter driver before running any tests.
setUpAll(() async {
driver = await FlutterDriver.connect();
});
// Close the connection to the driver after the tests have completed.
tearDownAll(() async {
if (driver != null) {
driver.close();
}
});
test('Should start with counter 0', () async {
  expect(await driver.getText(counterText), "0");
});
test('Should increase counter by 1', () async {
  await driver.tap(incrementButton);
  expect(await driver.getText(counterText), "1");
});
});
}
Keep in mind that order of tests is important. First test will be executed first and the next one will inherit the app state.
5. Running the Flutter UI tests
Finally we just need to know how to run those tests. We need two things here:
- One device or emulator connected to run them
- The command
The first one is pretty easy to understand and doesn’t need any further explanation, and for the second one all we need is to run:
flutter drive –target=test_driver/app.dart
Where “app.dart” is the name of the file we first created.
Repo link to the code example: https://github.com/diegolaballos/flutter-ui-testing
What are Flutter UI Testing challenges?
Writing UI tests has many benefits. They’re one of the most reliable types of tests in the testing pyramid since they are the closest ones to the end user experience and will give you the most certainty that your Flutter app is actually working as it should. However they also have their own cons. These problems we’ll see now are, most of them, not only related to Flutter. They are present for almost any other UI testing framework.
1. High cost of creating UI tests
Writing UI tests takes time. It takes time to write them for the first time and it also consumes time to maintain them every time there’s a change in the UI. Even the smaller designs tweaks can break a UI test.
We have to keep in mind that writing UI tests will be part of our codebase. And most of the time, if we want to have good coverage, those tests will be a considerable portion of our code. As any other code we have to maintain it.
2. Need for highly skilled developer resources
No matter which project, developers are always busy. And it’s expensive to hire additional devs. That’s the drawback when it comes to authoring UI tests with traditional testing frameworks like flutter_driver. Each command needs to be scripted and some use cases are really complicated to test.
3. Flutter add-to-app feature can’t be tested
Flutter has a neat feature that allows you to add Flutter code to an existing Android or iOS app.
Maybe you already have a native app and you‘re thinking about using Flutter for some of your screens. The good news is that you can.
You might also have an app you want to rewrite in Flutter but you don’t want to do it all at once. That’s also possible since you can start rewriting screen by screen while you keep releasing new versions to users with this add-to-app feature.
The bad news though is that you won’t be able to test that Flutter code integrated into your native app. At least that’s not possible at the time of writing this article.
4. Other minor issues with Flutter UI testing
Flutter comes with a really good testing framework. Specially keeping in mind that Flutter is a new technology a few years old. However there are still some minor issues you’ll see as soon as you start writing more UI tests and digging deeper into its testing framework.
And I say “minor issues” because I think most of them will be fixed soon. Probably with time the Flutter testing framework will be getting better and better and the problems I’m going to mention will be gone soon. However since these are still issues you might encounter let me enumerate them:
- It’s hard to inject different setup from test file into the application file
- Each test in _test.dart file depends on the previous test
- You can’t run a command to execute all tests in different files
- They are much slower than Widget Tests
Luckily there are workarounds to fix them and improve your Flutter testing experience.
What tools can help with Flutter UI testing?
So, on one hand we know UI tests are important because they help us to keep our app as much bug-free as possible. On the other hand we also know that writing those tests has its own disadvantages.
Is there another solution that has a better balance between the benefits of having UI tests and the disadvantages of creating and maintaining them? Thankfully, yes.
You might want to check out tools from the field of no-code UI test automation tools – they have the huge advantage to automate tests without the need of code.
How can Repeato help with Flutter UI testing?
Tools like Repeato can help you find the perfect balance by fixing some of the most common issues we’ve been seeing.
Create UI tests in less time
Tools like Repeato can help you save some time when testing your project’s user interface. No need to go back to the code to check the ID of a given view or widget, no need to synchronize everything when asynchronous code is involved… With Repeato you just record the actions the user will perform and that’s all, the software will take care of everything else.
Even some design changes won’t require a new test recording since the software is smart enough to reuse the existing test if the UI didn’t change that much.
No developer resources needed
Almost anyone can start creating tests with Repeato. The learning curve is very simple and no coding skills are required.
In one day, anyone in your team can take the responsibility of creating, maintaining and executing the UI tests.
The big benefit here is that, most probably, the hourly rate or salary of these people could be lower than what developers are getting.
Platform/technology agnostic
Remember the add-to-app issue with Flutter? That won’t be an issue because Repeato is platform agnostic. It doesn’t care about which technology or framework you use. It just cares about what’s shown on the screen.
In other words, it behaves like a user. It doesn’t care about the underlying architecture of your app and which libraries you use, it just operates with the visible part of your app (the UI).
Since recording and replaying tests with Repeato doesn’t depend on the technology you’re using, you can mix native Android/iOS code with Flutter without any problem.
Summary
Flutter UI testing is crucial for making sure the apps we deliver are flawless. Writing a simple manual test for Flutter is not difficult. The challenge rather starts when you add more complexity and routine to the process: if you have to test a lot, update and fix tests regularly and keep your developers busy with writing code. Automated UI testing tools for Flutter can help you save time and effort and deliver smooth apps.
