Getting started
How to record tests with Repeato
Section titled “How to record tests with Repeato”Our primary focus is to keep things simple, so also non-technical people can work with Repeato.
Repeato Studio is a regression testing tool that allows you to:
- Record and edit Android, iOS or Web tests on simulators and physical devices
- Organise tests within a library and workspaces
- Assign tests to test batches and run those
- Export shareable batch run reports
- Share your workspace with your team mates
Checking (asserting) UI elements
Section titled “Checking (asserting) UI elements”Before Repeato can automatically check our app, we need to tell it what it should look for.
In this video we take a look at the 3 ways to assert UI elements:
- Fingerprint
- Text / Numbers
- Dynamic content (AI Vision)
Editing tests in “Record and play”
Section titled “Editing tests in “Record and play””Repeato allows you to quickly edit tests by copying and pasting steps or dragging them around.
Also, here is a list of shortcuts you can use to get even more efficient:
- Mark multiple steps: Hold Shift or Ctrl (Cmd on Mac) and select multiple steps by clicking
- Copy step(s): Ctrl + C (or Cmd + C on Mac)
- Cut step(s): Ctrl + X (or Cmd + X on Mac)
- Paste step(s): Ctrl + V (or Cmd + V on Mac)
- Run test from current cursor position: Space
How to install your app on a device?
Section titled “How to install your app on a device?”Before you start testing with Repeato, you might want to install your app on your testing device.
Android: How to find your .apk file
Section titled “Android: How to find your .apk file”In Android Studio, select Build -> Build APK(s) -> Build APK(s) or Build -> Build APK(s)
Once the build is complete you can locate the .apk file by selecting “locate” in the dialog that appears, or by navigating to
{project name}/{app module name}/build/outputs/apk/iOS: How to find your .app file
Section titled “iOS: How to find your .app file”In Xcode, just build and run your application while targeting an iOS Simulator.
Once the build is complete and the app is running in the simulator, you can locate the .app file by navigating to Product -> Show Build Folder in Finder -> Products/Debug-iphonesimulator
For cloud iOS devices: Since an .app file is basically a folder, you need to zip before it can be installed on your cloud device.
How to install the app on your testing device
Section titled “How to install the app on your testing device”Just drag the .apk or the .zip file into the Repeato window where your device screen is showing:

Exporting and importing test steps, to and from the library
Section titled “Exporting and importing test steps, to and from the library”It’s possible to import whole tests from the library, but also just single steps.
Further, you can select steps and choose to export them as a separate test to the library. This can be quite helpful when you are trying to keep your tests small by breaking them apart into building blocks.
Launch arguments (AKA “Launch params”)
Section titled “Launch arguments (AKA “Launch params”)”The start app step allows you to pass additional data to your app. You could for example send a “testing” param, so the app can show only testing data.
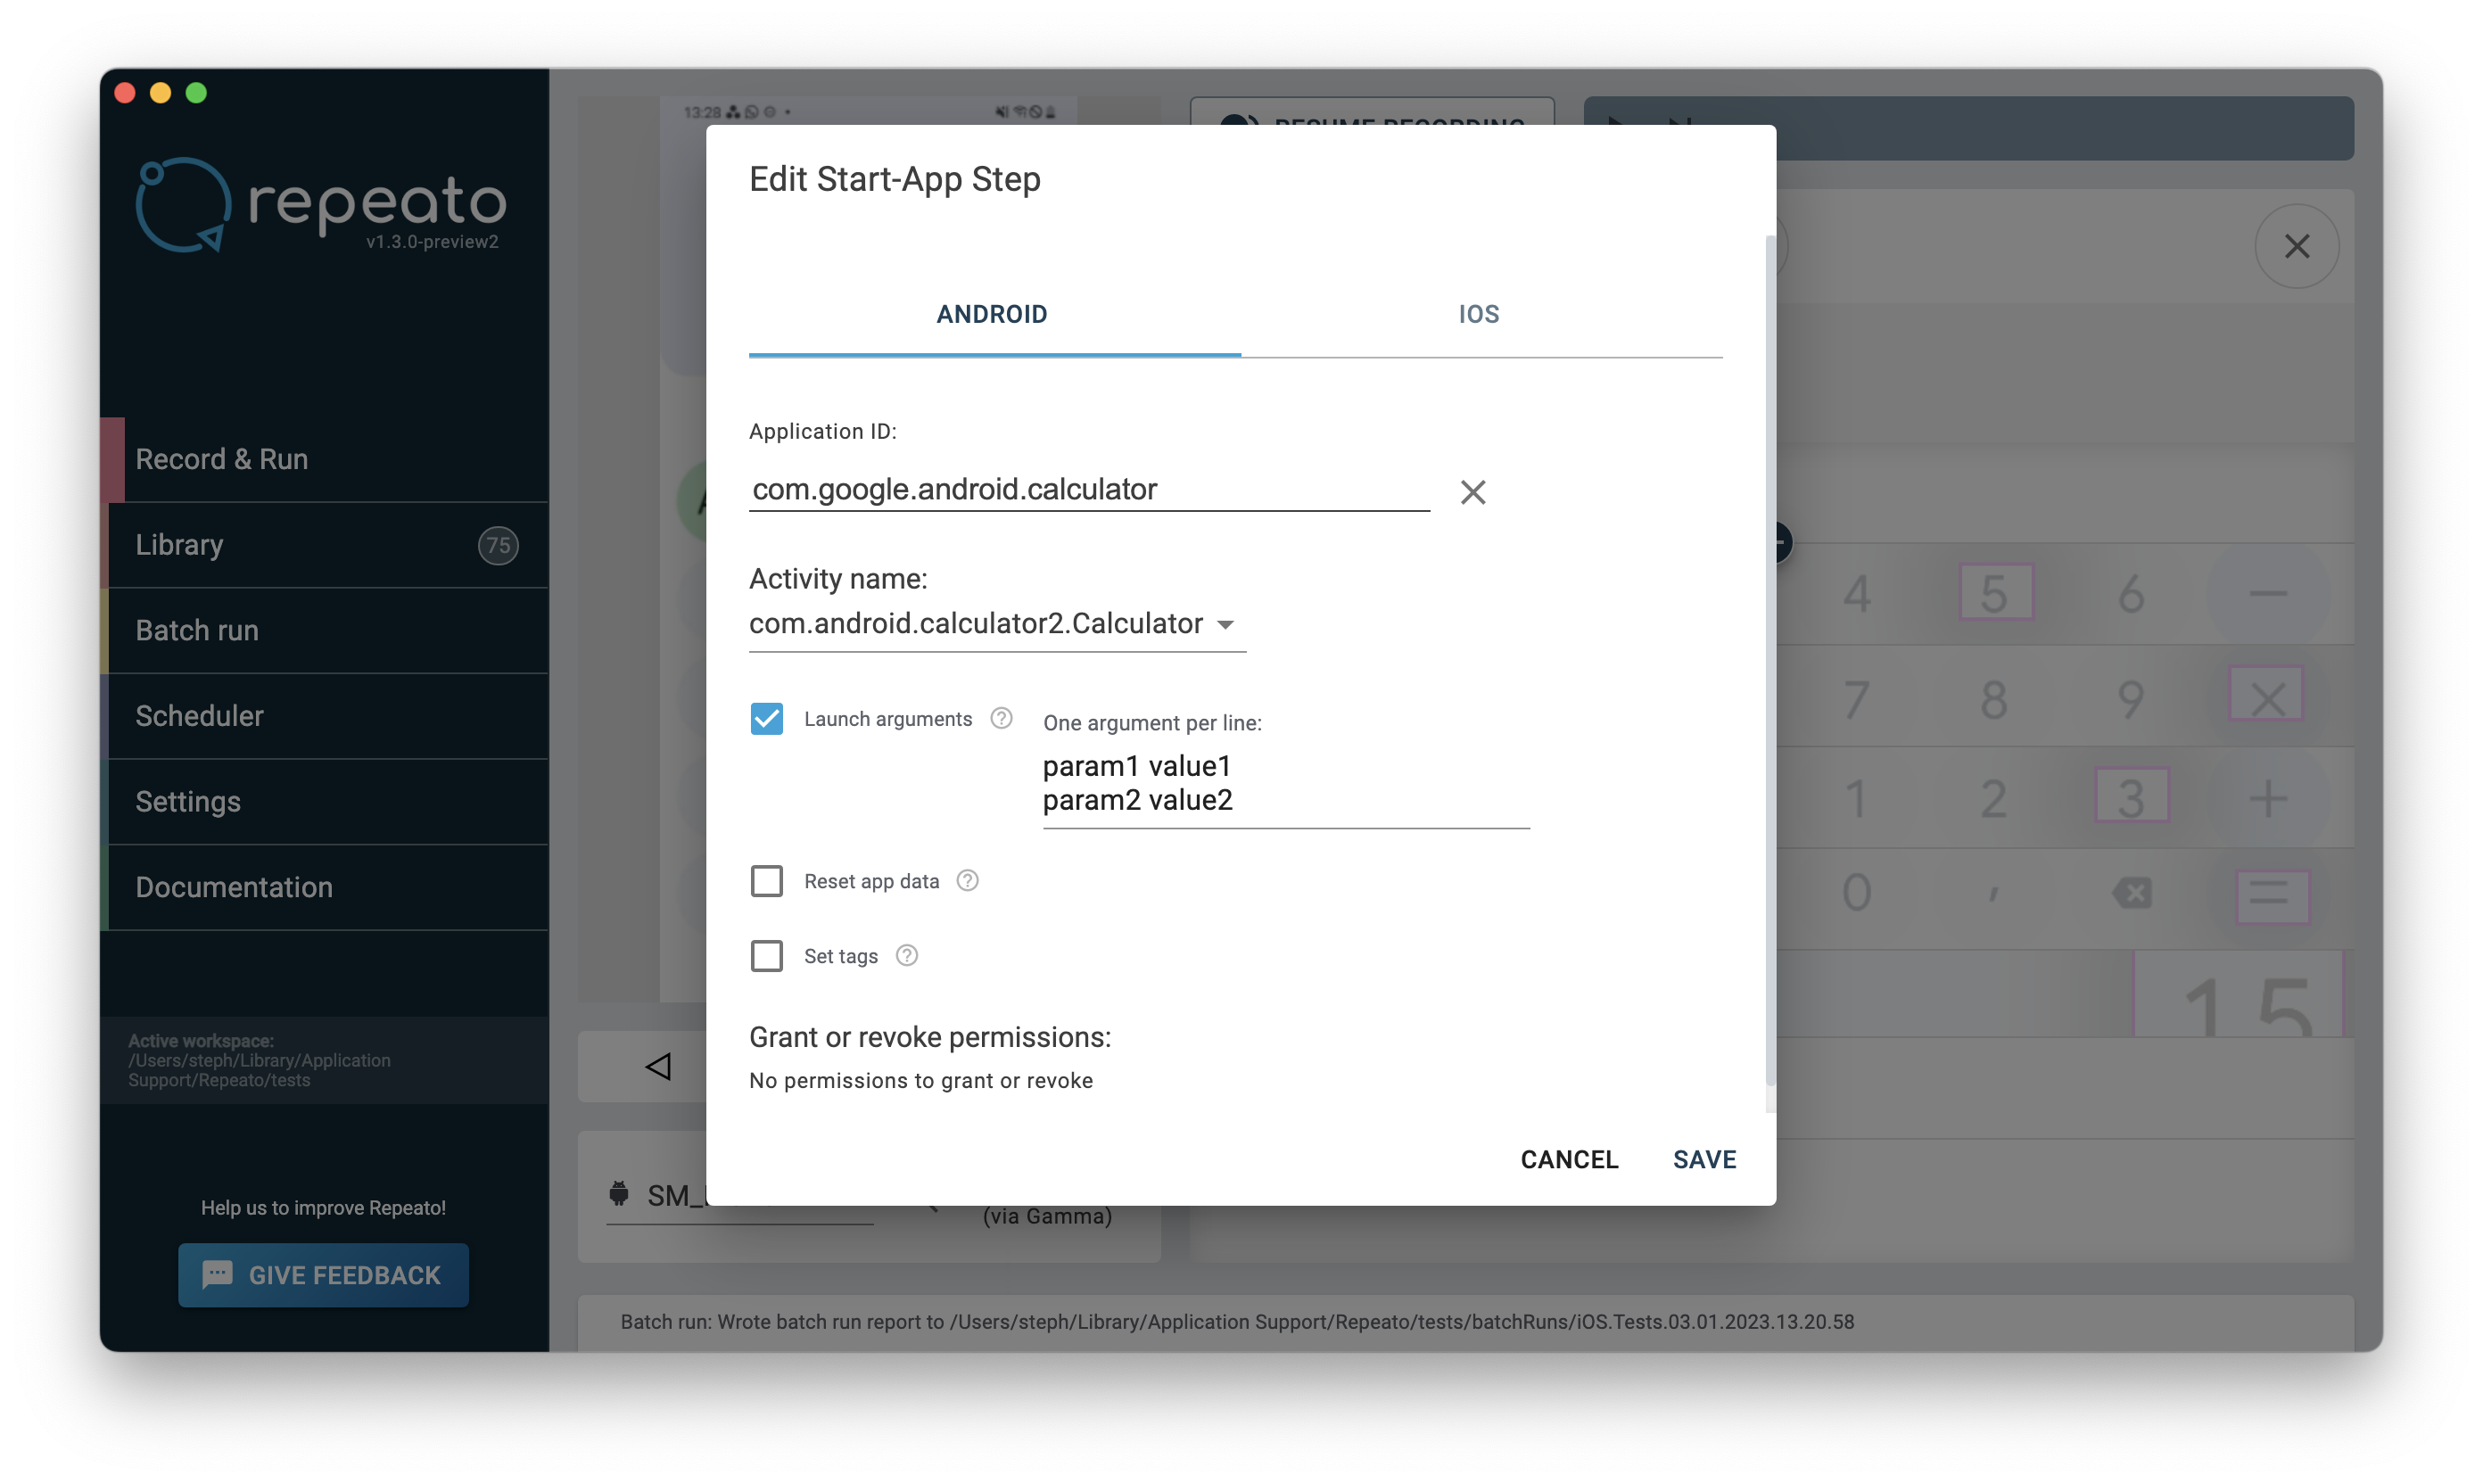
You need to set one argument per line.
If you don’t have access to the source code of your app, or the app is built by someone else, you can send them those instructions, so they know how to receive the data on the app side:
On Android you can access an argument inside of your app like this:
val myValue = intent.getStringExtra("my-launch-argument")On iOS you can add a launch argument like this:
-my-launch-argument 1
Inside of the app the param can be read like this:
UserDefaults.standard.string(forKey: "my-launch-argument")Swift
Please note: inside of Repeato you need to include the ”-”, but inside the app you need to access the argument via my-launch-argument (Don’t include -).
Good to know
Section titled “Good to know”How element search works:
Repeato always tries to be as quick as possible, by interacting with elements as soon as they show up. But it’s slightly more complicated.
This is how the element search works in more detail:
- Repeato test is started
- Repeato is starting the app. Next comes a “click element” step.
- Repeato is observing the screen…
- Repeato keeps searching up to a maximum amount of time. This is called “timeout” and it’s 8 seconds by default. However, Repeato waits longer in certain situations.
For example: The step AFTER the “start app” step get’s a longer timeout because the app start might take more than 8 seconds of time.
The timeout can be adjusted for each step individually. 5. as soon as it finds the right element, it waits till the element stops moving (e.g. screen transition animation). This increases the test stability and therefore reduces test-flakiness.
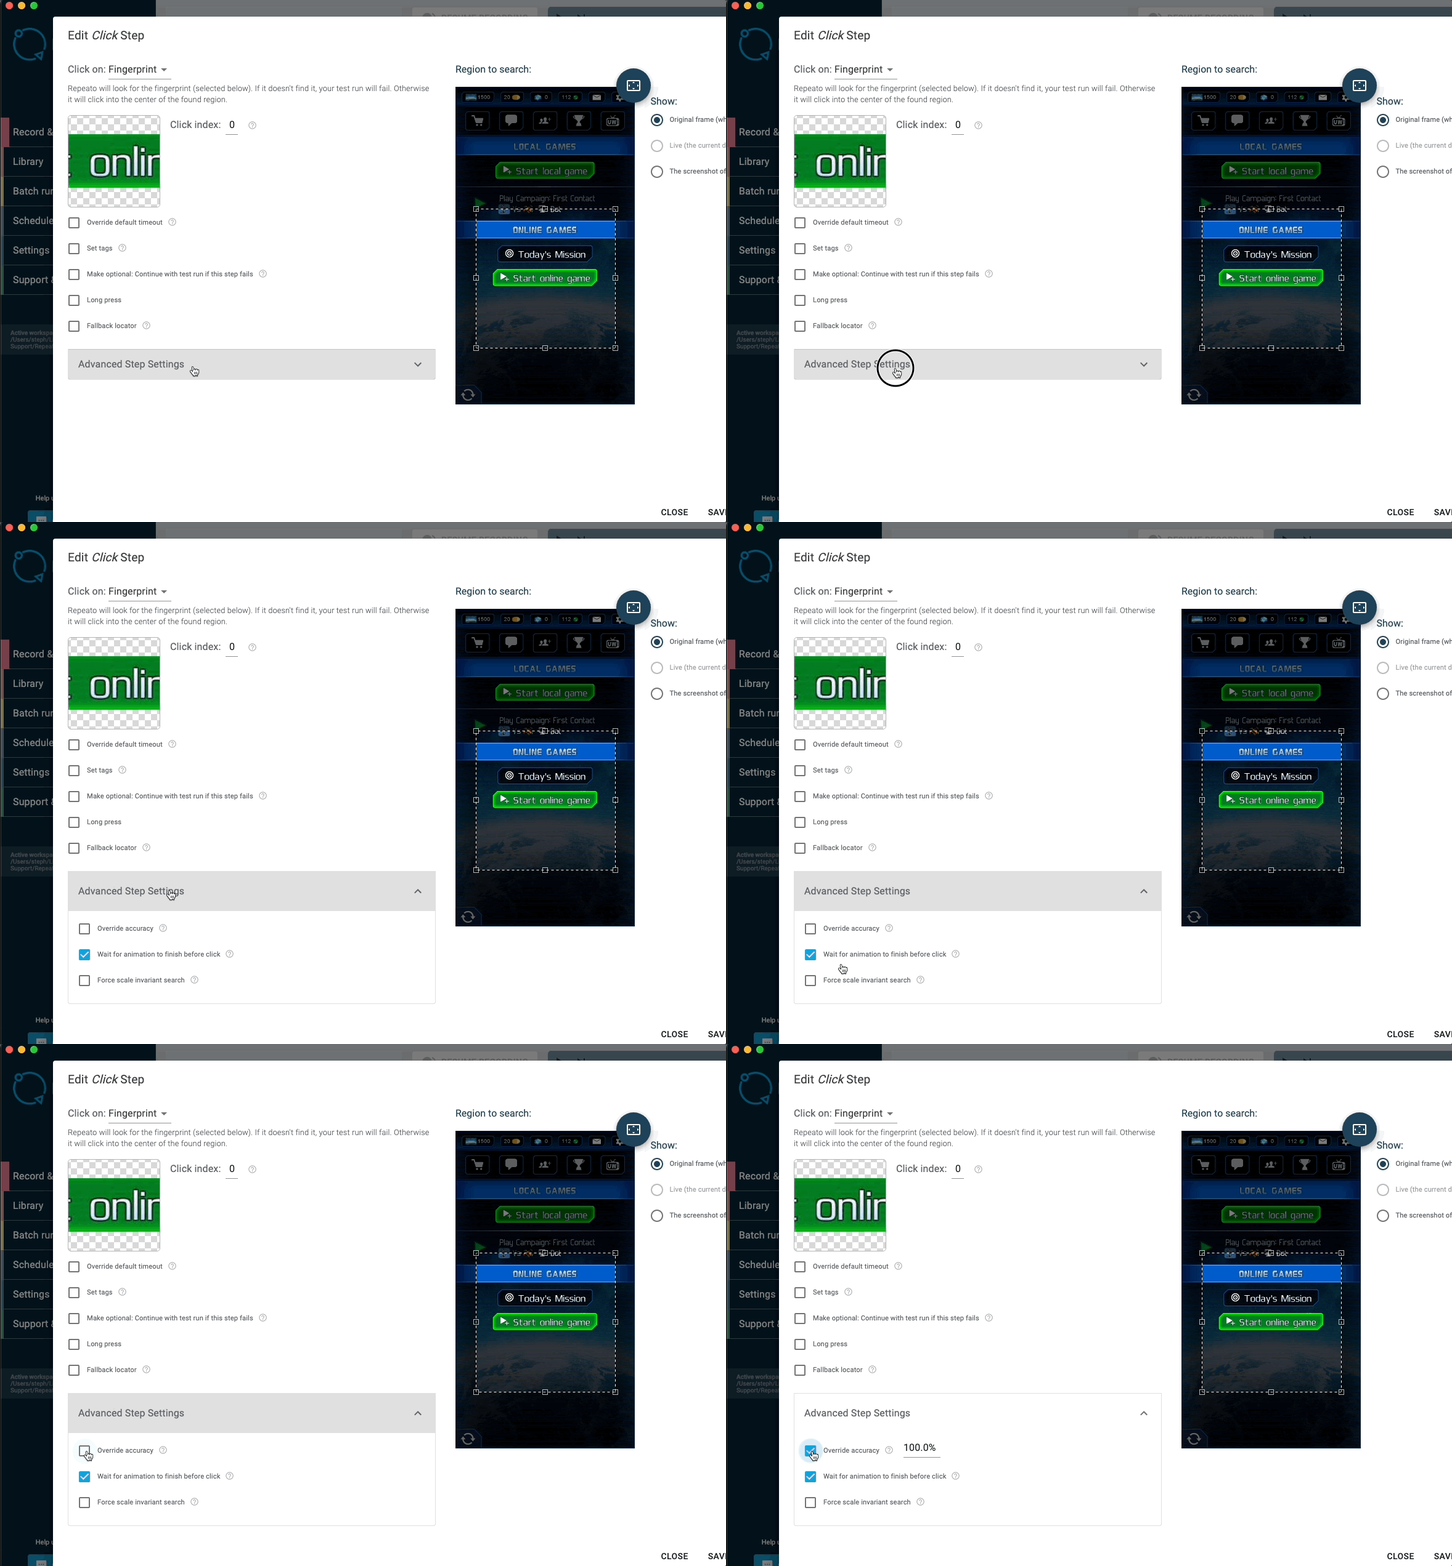
Advanced step settings
Section titled “Advanced step settings”Allows you to tweak the search algorithm.
1: Search accuracyAllows you to fine-tune the accuracy of the search algorithm. Decreasing the value will result in a more fuzzy search. Increasing it will make Repeato look more closely.
2: Wait for animation to finish before click:
This setting is enabled by default and will improve the stability of your tests. Repeato will wait for elements to stop moving before interacting with them. However, if you ever tried to automate interactions in a game, you might have noticed that Repeato was not able to click moving elements. Well, we got that fixed now.
3: Force scale invariant search
By default, Repeato will look for the fingerprint in the same size. But what if the element you are looking for changes it’s size? This can happen in a video game, think of a 3D scene, where objects that are further away will be rendered smaller. This setting will allow you to still find and interact with them.